| Modeling with Subdivision Surfaces/ Adding New Points and Faces |
Adding New Points and Faces
Copying pointsYou can add new points to a SDS object by using the standard Ctrl + drag method. In other words, hold down the Ctrl key while dragging a vertex with the left mouse button.
This duplicates and moves all the selected points. Creating faces through existing pointsTo create new faces through existing points: 1. Switch to the 'Point' editing mode.
Copying facesYou can copy faces similar to points - hold down the Ctrl key while dragging a face. This duplicates and moves the selected vertices or faces.
Adding new faces through edgesYou can create new faces also through existing edges by using the 'Add' tool. The tool creates a new face through the selected edges. For example, to connect two edges belonging to separate faces: 1. Switch to the 'Edge' mode.
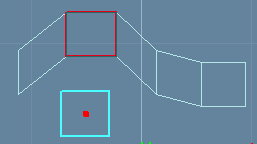
Creating new faces on the flyThe 'Add' face tool allows you to add new faces through existing edges or points. However, sometimes there are no suitable points or edges from which the new faces could be created. You can solve this problem by first creating the points (by dragging existing points with the Ctrl key as described earlier) and then using the 'Add' tool to create a face through the points. The 'Faces' tool speeds up this process by allowing you to enter new points and faces simultaneously. This tool also allows you to snap to existing points.
For example, if you have a 5x2 SDS mesh and you would like to make it 6x2 mesh by inserting a new face to the tail of the mesh: 1. Select the mesh to be modified.
4. When all the four points are inserted, select Accept to terminate the face creation. Note: if you want to create several faces which all will have equal point count, you can use the 'Auto Accept' mode. For example, to create faces with four points, set 'Points per face' to 4. A new face is created every 4th entered point.
Note: if you only want to insert new points to the selected object (not faces), reset the 'Create Face' option.
|


 |
 |